REVIEW · ARUSHA
KILIMANJARO MACHAME ROUTE, (Climb 7days) “Whiskey” route
Book on Viator →Operated by Guide Private · Bookable on Viator
Kilimanjaro is a long-night mission with big payoffs. What makes the Machame route (Whiskey, 7 days) appealing is how it mixes steady climbing with smart altitude pacing, from the lush rain forest up to the Arctic zone near the top. I also like that you’re not left guessing about logistics: pickup is offered, and you get a mobile ticket.
One thing to consider up front: the summit push starts around midnight and the cold and wind at altitude can be extreme, so this is not a casual hike.
In This Review
- Quick hits before you commit to the Machame Whiskey route
- Entering the Machame Whiskey plan: what makes it work
- Your first day: Machame Gate to Machame Camp in the rain forest
- Day 2: Shira Plateau moorlands, river gorge, and heather
- Day 3: Lava Tower altitude work and the Senecio Forest descent to Barranco
- Day 4: Barranco Wall to Karanga Camp, a short day with a big payoff
- Day 5: Karanga to Barafu Camp and the view-variable summit setup
- Day 6: Midnight to Uhuru Peak via Stella Point sunrise
- Day 7: Mweka descent, summit certificates, and the last muddy miles
- Guides, food, and why “private” can change your experience
- Price and value: what $2,564 gets you (and what to sanity-check)
- Logistics that actually affect your comfort
- Who this climb fits best, and who should think twice
- Should you book the Kilimanjaro Machame (Whiskey) 7-day climb?
- FAQ
- How long is the Kilimanjaro Machame route on this option?
- Where does the climb start and where do you end?
- Is pickup included?
- Is this a private tour?
- What fitness level do I need?
- Are park admission tickets included?
- What if I need to cancel or the weather is bad?
Quick hits before you commit to the Machame Whiskey route
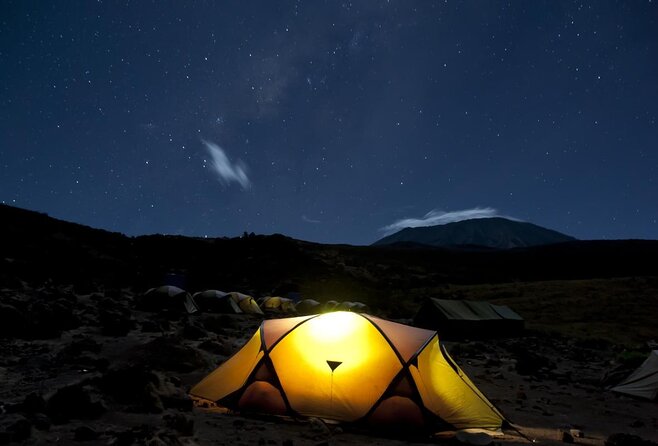
- Paul and his team are consistently praised for careful attention, good guidance, and teamwork on summit day
- You get a classic Machame flow: rain forest → heather/moorland → alpine desert → Arctic zone → rain forest descent
- The plan includes acclimatization built into the schedule, not just “walk higher and hope”
- You pass major named spots like the Great Barranco Wall, Lava Tower, Stella Point, and Uhuru Peak
- The route is listed as private, so it’s only your group in the activity
Entering the Machame Whiskey plan: what makes it work
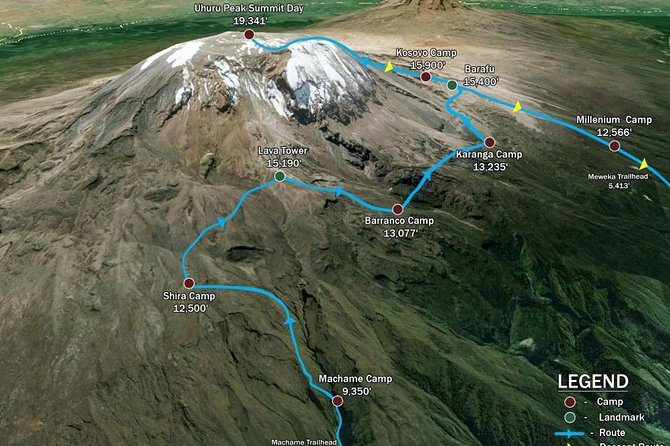
If you’re choosing among Kilimanjaro routes, the Machame route is one of the more popular ways to get yourself to the summit because it gives you variety in scenery—and it builds in days that help your body adjust.
On this 7-day climb, you start at Machame Gate and work your way up through several distinct ecological zones. You begin around 5,380 ft (Machame Gate) and finish the summit region around 19,341 ft (Uhuru Peak). That range matters because altitude affects sleep, appetite, hydration, and how hard every step feels.
The Whiskey-style timing keeps the rhythm practical. You’ll have longer travel days when the terrain fits, plus shorter “breather” segments intended to improve acclimatization. It’s still tough. But it’s tough in a planned way, not a random series of climbs.
A final note that matters for value: the experience description emphasizes experienced staff across tourism fields, with friendly guides and cooks. And in real-world feedback, Paul specifically is credited with great care and even support for a gluten-free diet.
You can also read our reviews of more tours and experiences in Arusha.
Your first day: Machame Gate to Machame Camp in the rain forest
Day 1 is a rain forest start, with a gradual climb that helps you get warmed up before the real altitude squeeze begins. You drive from Moshi (about 50 minutes) to the Machame Gate, then hike from roughly 5,380 ft to 9,350 ft over about 11 km / 7 miles and 5–7 hours.
You’ll walk through dense forest on a winding trail up a ridge until you reach Machame Camp. This is a good setup day because it’s not all brute effort. The forest environment tends to keep the hiking feel less exposed, and you’re building the habit of moving steadily without burning out.
Practical tip: on Day 1, don’t treat it like day one of a fitness boot camp. Your breathing matters more than your pace at Kilimanjaro.
Day 2: Shira Plateau moorlands, river gorge, and heather
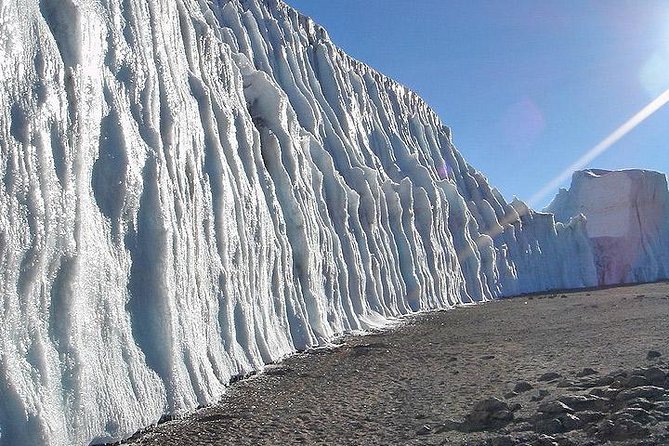
On Day 2 you go from Machame Camp to Shira 2 Camp. Elevation jumps from 9,350 ft to 12,500 ft. The distance is short—about 5 km / 3 miles—but the hike still takes 4–6 hours, because altitude and terrain do the heavy lifting.
You leave the rain forest and shift into heath: open moorlands, heather, and a more barren feel underfoot. A key feature is crossing a large river gorge along the way.
Why this stop matters: the Shira Plateau segment helps you move upward while keeping the day manageable. It’s also a mental transition day. The air feels thinner, and the “mountain look” starts to replace the “forest trail” vibe.
Expect the weather to change faster here. Layers are your friend.
Day 3: Lava Tower altitude work and the Senecio Forest descent to Barranco
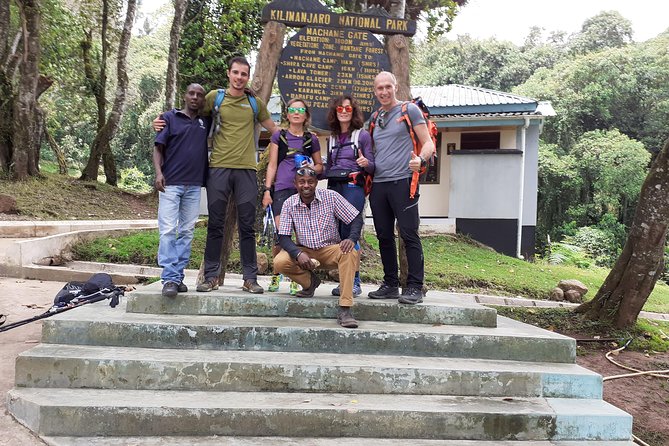
Day 3 is one of the defining days on this route. You start around 12,500 ft, climb to 15,190 ft near Lava Tower (about 7 km / 4 miles, 4–5 hours), then continue onward to Barranco Camp.
The itinerary highlights Lava Tower as a 300 ft tall volcanic rock formation. That matters because it’s a landmark—something concrete in a landscape that can otherwise feel endless. After the Lava Tower area, you descend to Barranco Camp down to about 13,044 ft, and you do it through the Senecio Forest.
There’s a smart acclimatization logic here: you start and end the day at roughly similar altitudes, but you spend time at higher elevation. That “top and drop” approach can help your body prepare for later climbs.
One practical note: any day with descent after altitude gain can be tougher on your legs than the numbers suggest. Trekking poles help a lot on uneven stone.
Day 4: Barranco Wall to Karanga Camp, a short day with a big payoff
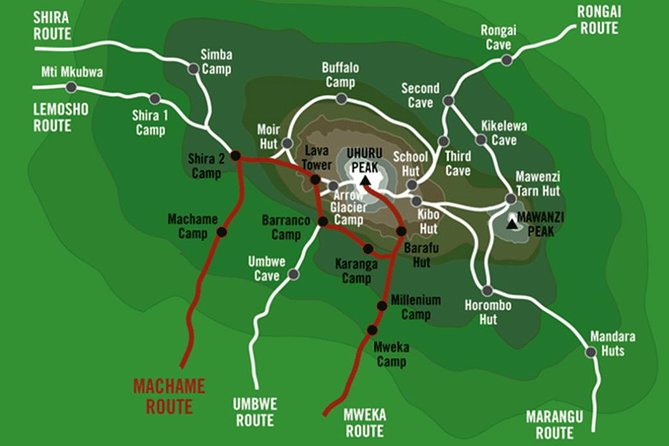
Day 4 moves from Barranco Camp to Karanga Camp. Elevation is similar on paper—13,044 ft to 13,106 ft—over about 5 km / 3 miles and 4–5 hours—but the description makes clear it’s not “easy mode.”
You descend into a ravine, then climb the base of the Great Barranco Wall. The wall is described as non-technical but steep, nearly 900 ft of climb. After that you cross hills and valleys, then descend sharply into Karanga Valley, with one more steep climb to reach Karanga Camp.
Why this day matters: Karanga is a key acclimatization stop. A shorter, strategic day like this can reduce the chance you’ll feel wrecked later—especially before the next push toward the higher camps.
If you’re prone to going too fast early, this is the day to slow down. The wall rewards steady effort.
Day 5: Karanga to Barafu Camp and the view-variable summit setup
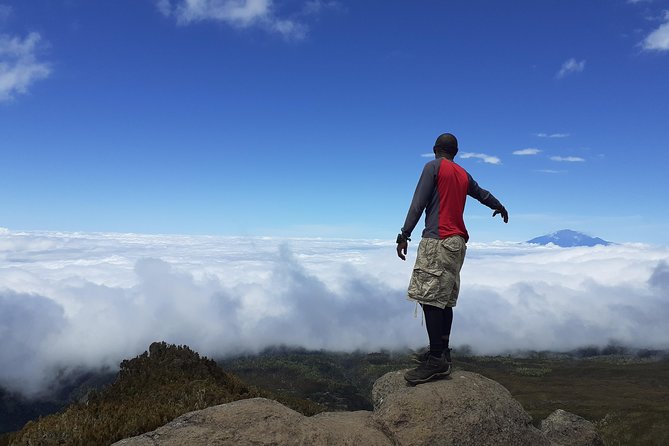
Day 5 is a transition into summit territory. You go from 13,106 ft to 15,331 ft over about 4 km / 2 miles, with 4–5 hours of walking.
The route mentions you hit the junction connecting with the Mweka Trail, then continue up the rocky section to Barafu Hut. Barafu is where you rest, eat early, and prepare for the summit attempt.
Here’s what the altitude setup buys you: once you reach Barafu, you’re close enough that you can see Mawenzi and Kibo, and the itinerary frames this as completing the Southern Circuit, with summit views from multiple angles.
Practical reality: Barafu is not a “wander around” camp. This is your logistics day. Your job is to sleep if you can, eat what you can, and be ready to move in the dark.
Day 6: Midnight to Uhuru Peak via Stella Point sunrise
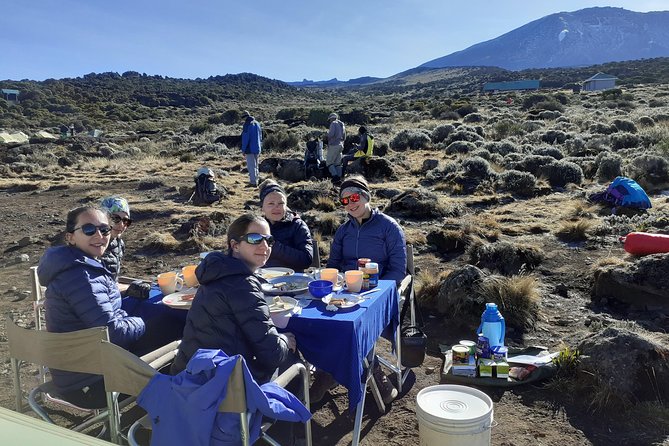
This is the day people remember most because it’s both mentally and physically demanding.
You begin the summit push around midnight, with a climb from about 15,331 ft to 19,341 ft over 5 km / 3 miles and 7–8 hours. The itinerary flags what you should take seriously: cold, wind, and extreme conditions at that altitude and hour.
You ascend in darkness for several hours, taking frequent but short breaks. Near Stella Point (18,900 ft) you get the payoff: the description calls it the most magnificent sunrise you’re ever likely to see, coming over Mawenzi.
Why this matters beyond the view: sunrise is also a psychological gear shift. You go from “survival walking” to “I can see the world change again.” That moment can help you keep going when your body wants to negotiate.
If you’re thinking about gear priorities, this is where you should treat warmth as non-negotiable: at these elevations, comfort is not optional.
After reaching Uhuru Peak, you continue to Mweka Camp, descending from 19,341 ft to 10,065 ft over about 12 km / 7 miles and 4–6 hours, through rain forest.
That descent can feel long even when you’re “done.” Your legs may get sore fast because you’re tired and the ground is still uneven.
Day 7: Mweka descent, summit certificates, and the last muddy miles
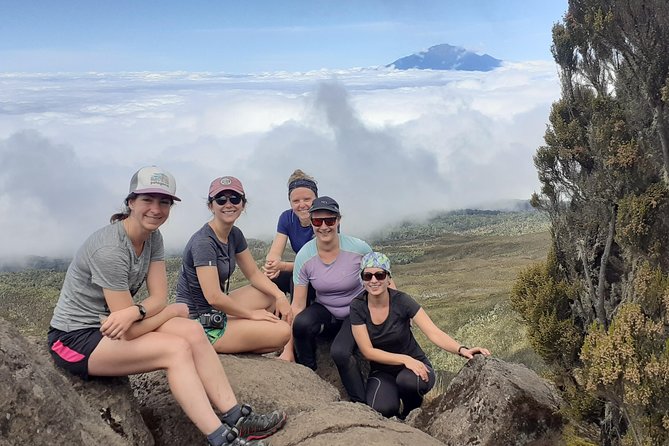
Day 7 finishes the climb by taking you from Mweka Camp to Mweka Gate. You drop from about 10,065 ft to 5,380 ft over 10 km / 6 miles, usually 3–4 hours.
You collect summit certificates at the gate. Then you keep descending about another hour to Mweka Village, where a vehicle meets you to drive back to your hotel in Moshi/Arusha.
The day can be wet and muddy at lower elevation. That’s not a reason to panic; it’s just a reason to expect slippery footing and pack accordingly.
Guides, food, and why “private” can change your experience
This is listed as a private tour/activity, meaning only your group participates. On a Kilimanjaro climb, that can matter more than it does on a city tour. You’ll be more likely to keep a consistent pace, get direct attention, and ask questions without feeling rushed.
The guides and cooks are highlighted as friendly, dedicated, and knowledgeable, with staff who make you feel at home. In the written feedback, Paul’s team stands out for care and attention, and one climber specifically mentions Paul can cater for gluten-free diets. That’s a big practical plus if you manage any food restrictions.
Food quality also shows up positively in that feedback. Even when you’re eating small portions at altitude, having meals that don’t upset your stomach helps you keep your energy for walking.
Price and value: what $2,564 gets you (and what to sanity-check)
At $2,564.11 per person for a 7-day climb, you’re paying for far more than route access. You’re paying for staff leadership, camp operations, and the rhythm of acclimatization across multiple elevation zones.
So how do you judge value quickly?
- You get a full climb arc: rain forest start, Shira Plateau, Lava Tower, Barranco Wall, Barafu prep, summit night, then a long descent with certificates.
- Park admission is listed as included/free in the itinerary notes (Day 1 marked included, later days marked free), which reduces surprises.
- Pickup is offered, and the experience notes a mobile ticket plus confirmation at booking. That’s basic, but it helps.
What you should sanity-check before you pay: how your body reacts to altitude. The itinerary says you should have moderate physical fitness. That doesn’t mean “you can do it casually.” It means you can handle long uphill days and cold nights with effort.
Logistics that actually affect your comfort
A few operational details from the experience listing are worth noting because they affect how easy your trip feels.
- Pickup offered and you’ll be driving from Moshi to the gate area at the start, then returning from Mweka Village to Moshi/Arusha.
- The experience is set as near public transportation, which can help for pre- or post-climb movement.
- The meeting window is listed broadly (Monday–Sunday, with hours from 8:00 AM to 11:30 PM). In practice, you’ll likely confirm exact timing when you book.
- Confirmation is received at booking and you get a mobile ticket.
Who this climb fits best, and who should think twice
This Machame route is best for people who:
- Want the classic Kilimanjaro progression through several ecosystems
- Can handle a midnight summit start and cold, windy conditions
- Have moderate physical fitness and can commit to steady hiking for multiple days
- Appreciate acclimatization pacing, not just “go as fast as possible”
It may not fit you as well if:
- You hate early mornings and you’re not ready for a long dark climb
- You know you struggle with cold or high-altitude discomfort
- You’re looking for something “easy.” This is not that.
Should you book the Kilimanjaro Machame (Whiskey) 7-day climb?
If you want a route with strong structure, clear summit-day milestones (Lava Tower, Barranco Wall, Stella Point, Uhuru Peak), and a team that focuses on care, I’d put the Machame Whiskey plan near the top of your shortlist.
Book it if you’re ready for a serious altitude journey and you’ll take the acclimatization rhythm seriously. If that midnight summit push sounds like your nightmare, then consider a different itinerary style. But if you’re chasing that sunrise moment and you want a climb that feels organized from the forest start to the certificate finish, this one is a solid choice.
FAQ
How long is the Kilimanjaro Machame route on this option?
It’s listed as 7 days with hikes spread across multiple camps, including the summit push to Uhuru Peak and a final descent to Mweka Gate.
Where does the climb start and where do you end?
You start at Machame Gate and finish at Mweka Gate. After collecting summit certificates at the gate, you continue to Mweka Village, where you’re driven back to your hotel in Moshi/Arusha.
Is pickup included?
Pickup is offered, and the itinerary mentions a drive from Moshi to Machame Gate at the start, plus transportation back after the final hike.
Is this a private tour?
Yes. This is listed as a private tour/activity, meaning only your group will participate.
What fitness level do I need?
The listing says you should have a moderate physical fitness level.
Are park admission tickets included?
The itinerary notes admission ticket included on Day 1, and free on subsequent days as listed in the schedule.
What if I need to cancel or the weather is bad?
You can cancel up to 6 days in advance for a full refund. If weather is poor and the experience is canceled, you’ll be offered a different date or a full refund.